In AMSHub, a resource is anything that you want to assign a cost to and associate to a procedure. This might be commodity supplies, a person’s time, or an allocation for facility overhead. You will assign a dollar amount to each resource that will be used to track the cost against procedure profitability. You can also collect multiple resources into Resource Bundles.
Some specific examples facilities are using resources for include: gloves, shoe covers, dermabond, specimen cup, 60ml syringe, Phenergan 25mg IV, etc… These items are not in your AMSHub inventory, but adding them in resources and attaching them to a procedure, will provide a better idea of all items and costs involved in a procedure.
Resources also have the ability to track, similar to your Inventory items. You can set a starting on hand quantity, and as Resources are added to Procedures directly or via Bundles, their usage will be tracked and decrement your on-hand quantity. You can then use the Resources Reorder report to help you in your reordering of commodity supplies and other similar items you choose to track in Resources.
To add a new Resource, go to Resources>Manage in AMSHub and use the Add Resource button in the top right corner of the screen. Fill in the item name, vendor, item reference number, cost, high and low par, quantity on hand, item description and hit the save button.
AMSHub will generate an item number associated to this resource. You can then click the QR Code button to generate a QR Code for this Resource to scan on-screen, or to print out for scanning any time this item is used. You can get more information on printing QR codes here. You can also click the edit button to make changes, or the delete button to remove a resource.
Adding Resources to Procedures
You can scan a QR code or you can click the Plus icon at the bottom of the Procedures page below your inventory items, to add resources to a procedure:
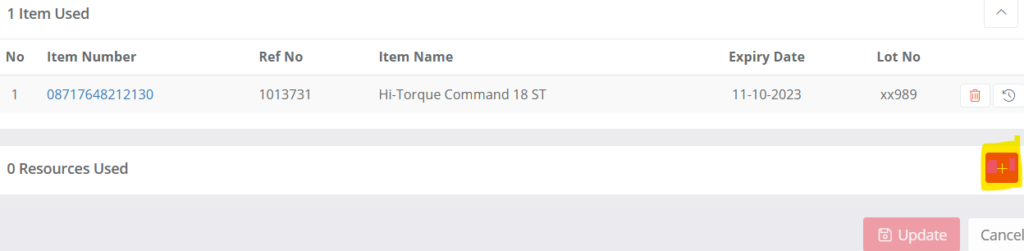
You will see all of your Resources and Resource Bundles here. Click the plus icon next to each item to manually add it to your procedure or scan the QR code if you printed those out. To add more than one of any item, click the plus icon as many times as needed to add the desired quantity. If you have a large number of Resources or Resource Bundles, use the filter box and type a few characters of the item’s name to quickly find the desired item(s) and add them. To quickly get to your most used items, click the heart icon next to the name to tag an item as a Favorite. Your Favorites will automatically shift to the top of your list for fast and easy access in the future. Selected Resources and Bundles will be saved in the procedure details to help calculate the most accurate case costs possible.
Sharing Resources
For Groups using AMSHub, you can use the sharing feature to deploy resources across your network. If your facility is part of a group you’ll see a share icon for each resource, as well as a checkbox for each. You can use either option to access the sharing feature. If you want to share all resources listed for your facility, you will click the check box in the title area next to ref number, as that is the select all box and will select all resources from your list. Once that box is checked an Actions button will appear. Click on the Actions button and you will select Share. You will select the facility you would like to share the resources with and click Share Now. All resources will then be shared with that facility. If you only want to share some resources you can use the share button on the item line of each resource and share them one at a time or you can use the select all button and deselect the resources you don’t want to share and follow the same directions as using select all. Once you have unchecked the checkboxes for the resources you don’t want included you will follow the same steps above. Whichever facility creates the resource becomes the “owner” of that resource and is the only facility that can make changes to it. The resource will automatically appear to all other facilities as soon as it’s created and will appear “locked” to the other locations, but they can use it immediately.
Importing Resources
If you are able to export resource data from another vendor such as McKesson or Henry Shein, you can use our import template to quickly add all of your resources and associated prices into AMSHub. Additionally, if you’d rather work in Excel to prepare your Resources rather than using the process explained above, our Import option is for you. In either case, Go to Settings > Resources and click the Import button in the upper right. Download the Import Template. This will get you our import template with all our required columns. If you exported your data from another vendor, copy the data from your excel doc into ours. If you’re using the template simply for manual editing purposes then add all of your details. There is information about what should be in each column on the Import Resources pop up window where you downloaded the import template from.
Once you have your document ready, return to Settings > Resources and click the Import button. Jump to Step 3. Select the new file you created with our template and import it. You’re done with importing!
All the items from your document will now be listed under Resources (note that by default when you go to this area it starts you in Resource Bundles, so click the Resources button to toggle between the individual Resources and any Resource Bundles you’ve made. The next step would be to create Resource Bundles if you decide to use that feature.
You can also export your existing Resources from AMSHub into the resources template excel document. If you’re more comfortable making changes to this data in Excel rather than using the interface in AMSHub, you can export, make all of your changes in Excel, and then import your updated file back into AMSHub.